Showing posts with label sewing. Show all posts

Stockholm Sewing Festival

This weekend my aunt, my mom and I visited the Stockholm Sewing Festival at Stockholm International Fairs. I love the Sewing Festival! It's the largest Swedish fair for sewing, quilting, knitting, embroidery and a host of other, fabric related crafts. Always really inspirational to visit.

It's been a couple of years since I last went, and to be honest I think that's a good thing - a lot of the sellers return every year so you start to recognize things from previous years. But after waiting a couple of years I found lots of new inspiration!

One of the biggest thrills for me this year was visiting an entire stall devoted to English paper piecing - I rarely see a lot of EPP in Sweden but apparently it's on the rise! If you're in Sweden and feel like buying some EPP supplies without splurging on overseas shipping, have a look at QuiltPassion! I couldn't resist buying some hand quilting thread, it will come in very handy once I start sewing my hexie quilt together. I also got some clamshell templates - not sure what they will become yet, but I'm thinking maybe a pillow using some of the Liberty fabric I got in London?

 Of course I had to get some fabric, too, but I tried to resist impulse buying. The yellow, orange and red in the photo above is going straight into a project, so I figure it almost doesn't count... Oh well. I did manage NOT to buy this amazing wool embroidery kit from Swedish embroidery artist Karin Holmberg. I love the look of wool embroidery and I would really like to give it a go, but I just don't think I'm ready to take on a huge project like this. I'm hoping to take a class on wool embroidery someday, there's so much to learn!


I spent a lot of time ooh:ing and aah:ing over all the traditional swedish wool embroidery at the fair though. All those vibrant colors - yum!


In other news, I have had my hands full with starting a new job, mom visiting and Keith contracting a really nasty virus which completely knocked him out - meaning our Valentine's Day was spent on the couch watching TV. I did get him some flowers and chocolate though, so not a total loss! I hope to get back to blogging regularly soon, I just need to find a way to organize myself and get settled with the new job. Hope you all have a great week!

Photo Fabric Cushion finally complete!

Another old project has been crossed off my to do-list! I stared this photo fabric cushion back in October, but really I have had the idea in the back of my mind since 2008 when I made a photo memory quilt for my mother. Yes, I'm that slow! But this weekend I visited my mom and we spent a day out in her sewing studio. Working on old WIPs is always more fun when you have company! I'm really pleased with the final product.

If I was going to do anything different next time, I might add a border to the front in order to make the photos "pop" more - you can see in the photo above how the curve of the cushion sort of hides the edges of some of the photos. Ah well, live and learn!


This is the back with a single button closure. Since the cushion cover is not very large (finished size is about 33 cm / 13 inches squared) I figured I'd only need one button to close it. The cushion is a tiny bit over-stuffed though, the reason being that the cushion insert is about an inch larger than the cover. If I can find the motivation, I might pull the insert out again and remove some of the stuffing, but I figured we'd use it for a while first because pillow and cushion inserts tend to flatten over time. Either that, or I'm just lazy! :-)

In other news, a cold and dark January is finally over this weekend and we are moving towards lighter times! I apologize again for the bad lighting in my photos lately - there's only so much you can do in Sweden this time a year without buying a bunch of professional lighting equipment... But as I say, we're moving in the right direction. I can't wait for spring!

My 2015 Crafty To Do-List


I told you last week I was working on a crafty to do-list for 2015. I started the year by doing a quick inventory of my ongoing projects, and soon realized that before I start too many new projects, I really need to focus on finishing old works in progress. I have a ton! So instead of listing the 200+ new projects I want to try out, I focused on the projects that I want to finish. Without further ado, I present my 2015 crafty to do-list!

KARIN'S 20 CRAFTS TO DO IN 2015 

1. Finish 1st sashiko pillow 
2. Finish 2nd sashiko pillow
3. Cut out and prep all hexies for my hexagon alphabet quilt 
4. Finish secret EPP project
5. Finish a PocketPhoto cozy for Ella
6. Make 2 china cake stands
7. Make 4 vintage tea cup candles
8. Finish sewing basket make-over
9. Finish photo patchwork cushion cover 
10. Sew wool embroidery pin cushion
11. Sew a hanging sleeve and mount mom’s wall quilt
12. Frame (and hopefully, sell) all machine embroidery pieces
13. Practice face and figure drawing
14. Make watercolor resist paintings
15. Cut and mat old linocut postcards
16. Finish little house lavender satchets
17. Start on vintage embroidery patchwork quilt
18. Sew doll quilt for mom’s garden play house
19. Finish yo-yo Christmas garland
20. Make 3 potholders from old quilt test blocks

What do you think? I will post updates to my list as I (hopefully) start to check things off. Here's to a crafty new year!

The London Report, part two

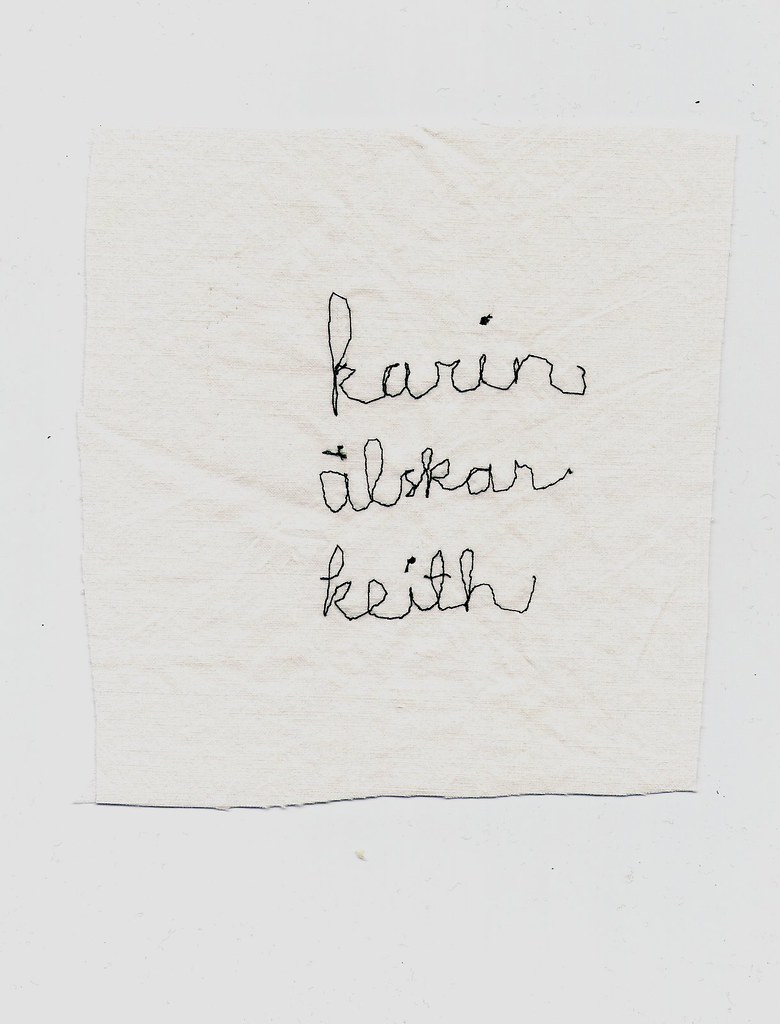
No London trip is complete with at least a little bit of shopping. And while shopping wasn't the primary goal of our trip, we did manage to stop by most of the stores I was hoping to visit. The Cass Art flagship store was great, as was Foyles and Forbidden planet (geek heaven!). And of course, the fabric and haberdashery sections at Liberty was fantastic as always. Above are my Liberty finds: gorgeous washi tapes, a pretty lavender sachet, and... What's in that white package, I wonder?

The above is a phone picture I snapped as we were unpacking our bags on Sunday. With the exception of apparel (because really, this is not a style blog - I doubt you'd be interested in a couple of Primark cardigans) and a few gifts, this is everything I bought on our trip. Of course, leave it to the librarian's daughter to pack her suitcase full of books she could just as well have bought online from the comfort of her living room... I can't help it, books just call out to me! But I also happen to think that books make great souvenirs - every time I pick up a particular book I'm reminded of how and where I got it, and that's the whole point of souvenirs, isn't it?

As you can see these books are mostly my regular brand of non-fiction, but there are a couple of craft/art books in there too. My plan is to learn how to draw faces and draw people in 2015! I also got some postcards, brushes and art masking fluid for a watercolor project I'm planning. And of course there are a few geeky things in there too - the Deathly Hallows key ring has since been turned into a necklace, and the chocolate frog has been devoured.

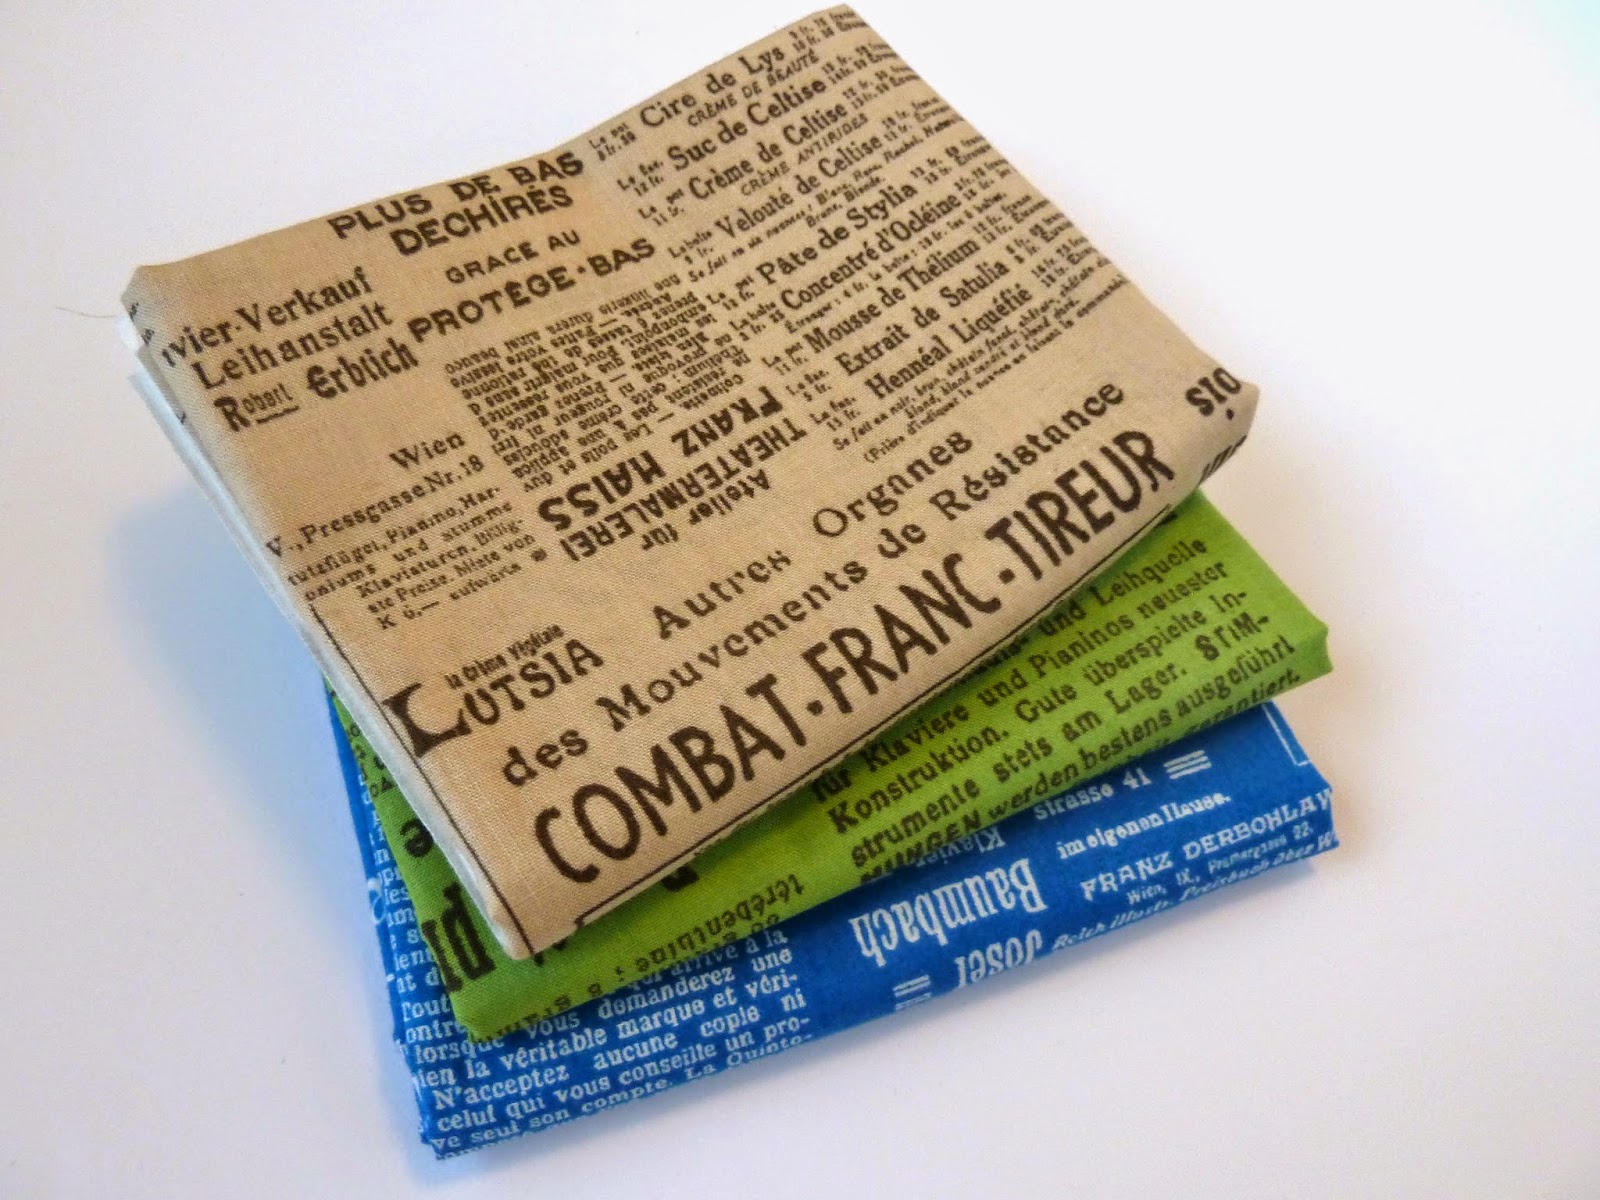
But now, for the all important fabric reveal. Get ready to drool!


Seriously, how amazing are these?? I've been trying to pick a favorite but it's just too hard! I love the Kayoko Tana Lawn, I bought it in red this time but I actually have it in another colorway (pink/cerise) as well. But I think my favorite of these is actually the red and green print at the top of the stack, I can see myself using that a lot next year. The only problem with Liberty fabrics is that they are so nice, you almost have to force yourself to cut into them. But I wan't these fabrics to be used, not just sit around, so I will have to get over that. Any tips on Liberty-worthy projects I should add to my list?
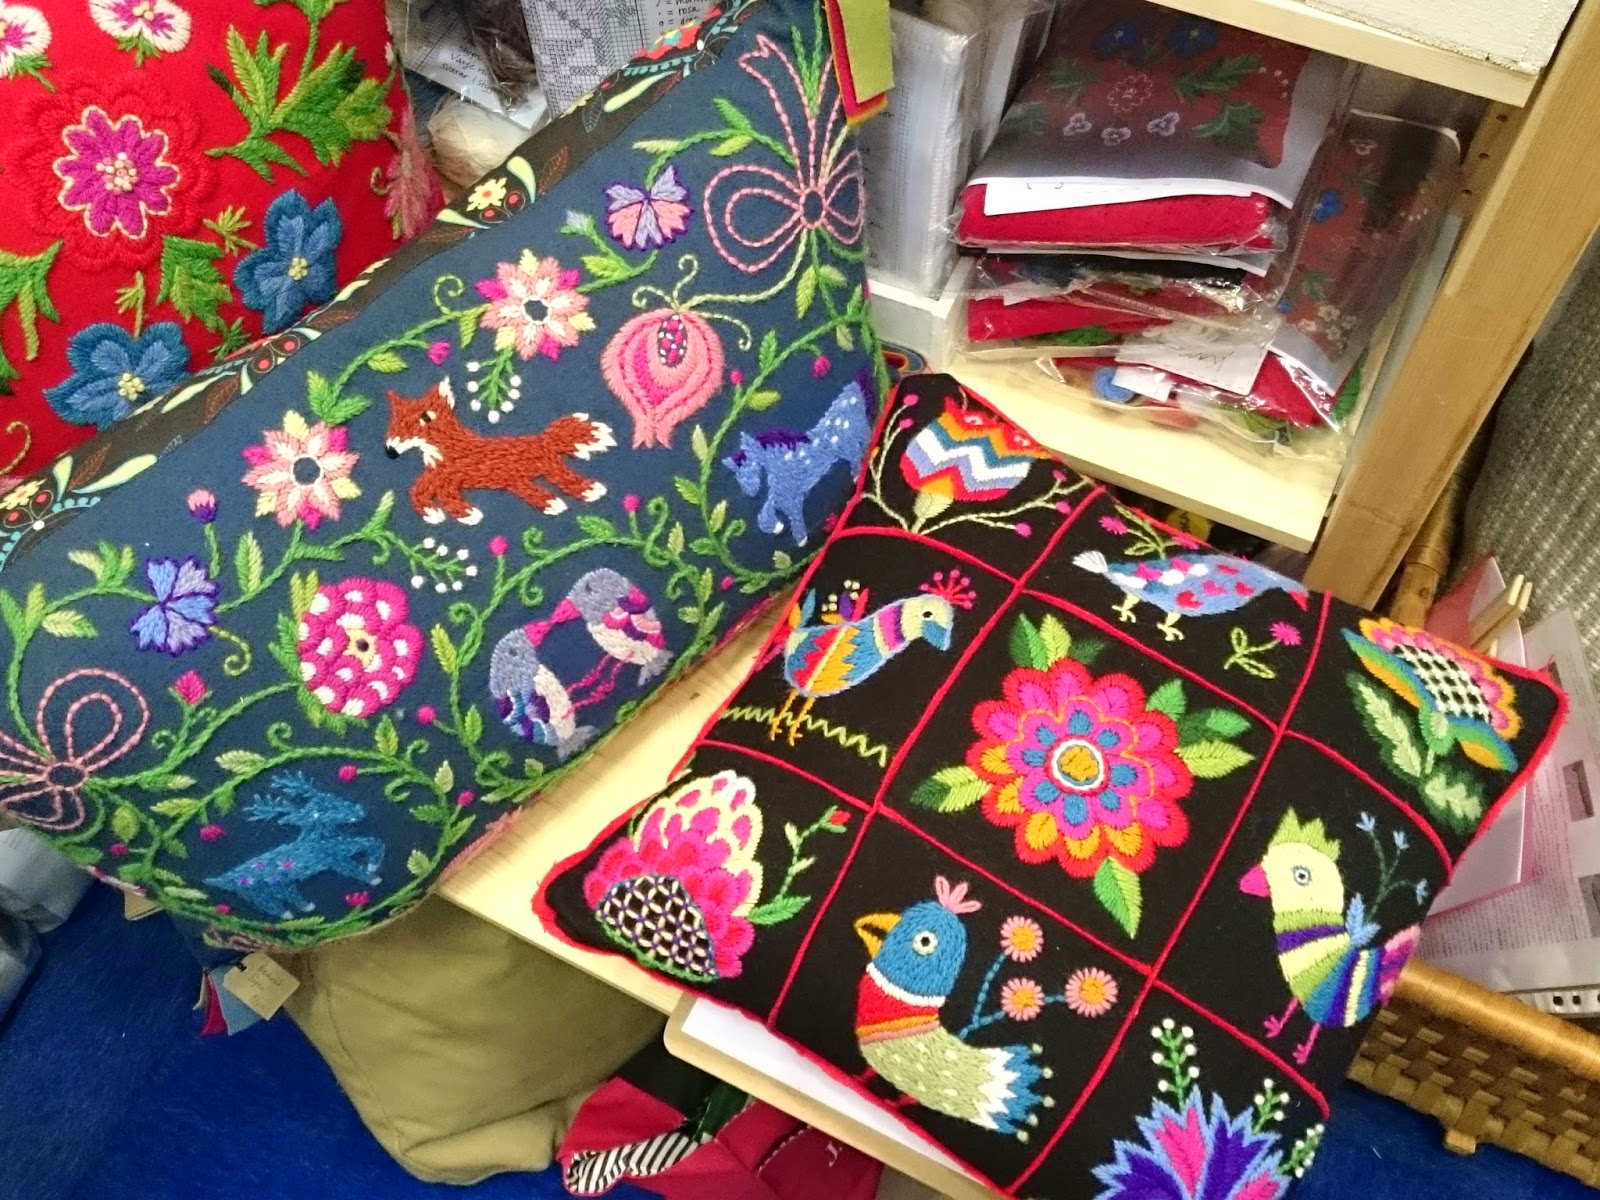
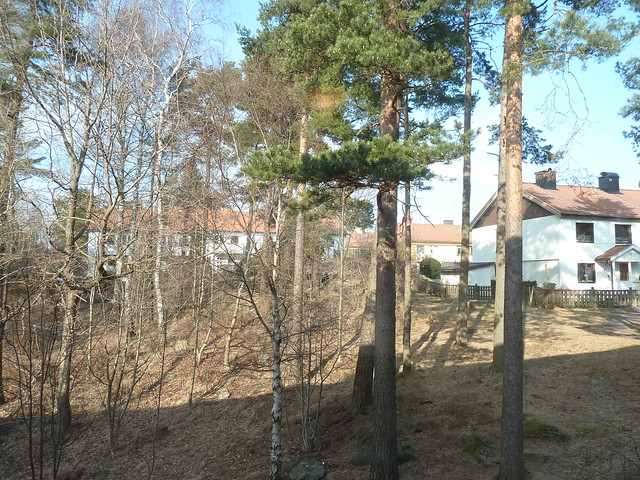

Utility sewing: Cover or cozy for my LG Pocket Photo

Most of the time when I make things, it's as much for the joy of making as for the finished product itself. The process is usually the purpose, and I revel in learning a new skill, exercising my creativity and making something with my hands. Not always, though. Sometimes crafting is all about utility - when you really need something, but despite the sea of products out there in our consumer culture, you can't find that specific thing ANYWHERE. Such was the case with this cozy/case for my LG Pocket Photo.

The Pocket Photo is an awesome mini printer which lets you print off smartphone photos in one click - I love mine and use it lots for smash booking and memory keeping. Since it's so small (less than 13x8 cm) and light (220 grams), it's ideal for keeping in your bag, ready to use whenever you feel like it. However, if you're anything like me, that bag is also used to house a ton of other stuff which could potentially scratch, dent or damage your awesome printer. I spent ages searching for a Pocket Photo case or cozy to prevent this, to no avail. I wanted a case that fit snugly and didn't take up too much space in my bag, but still had some padding to protect the printer from wear. Unfortunately, that turned out to be near impossible to find!


In the end I enlisted my dear mom so help me sew a cozy specifically for the Pocket Photo, and this is the end result. It's made of a heavy cotton with a felt lining, and I used velcro for the closure because I didn't want any metal zips or buttons that might themselves make marks on the printer. I'm actually quite pleased with the end result. It may not be something to write home about, but it does exactly what I need it to, and for once that's all I ask!

Cushion cover in the works

Wait, how is it the weekend already? This week went by in a flash, but unfortunately I don't have much to show for it, craft-wise. I'm still working on the photo cushion cover I wrote about a while ago - this week I finally pieced the front together, but I still need to buy a pillow insert and finish the back. I am completely in love with the photo fabric by the way, I keep thinking of new projects to make with it!


Speaking of photos, one of the worst things about living far north is the lack of daylight this time of year. At the moment, the sun rises about 8:30 am and sets at 3 pm here in Stockholm. That's not a lot of daylight as it is; and add to that the cloudy, rainy weather we've been having all week. It really gets on your nerves! It's also near impossible to take good photos this time of year, so my apologies in advance if you see a lot of photos on this blog in the coming weeks that don't quite measure up. I promise I'll do my best!


My Pinterest To Do-List

Are you a Pinterest fan? I totally am! I find it a great way to bookmark craft ideas, patterns and tutorials, as well as images that simply catch my eye in some way - a color combination, an unusual fabric, a spark of inspiration... Sometimes though, Pinterest can become less about finding inspiration for actual craft projects, and more of a black hole which sucks you in - and before you know it, three hours which COULD have been spent crafting are instead spent in front of the computer. So to challenge myself top actually MAKE some of the things from my Pinterest boards, I compiled a list of some favorite projects that I've pinned over the last year or so. All are reasonably simple projects which include instructions, so I really have no excuse to just GET GOING ALREADY.

1. Sashiko embroidery @ the Purl Bee 2. Awesome elastic pen strap @ tutsplus.com 3. House satchet @ a Spoonful of Sugar 4. Heart friendship bracelets @ HonestlyWTF 5. Zippered pouch @ A Quilters Table 6. Earbud Circle Pouch @ erinerickson.com 7. Brilliant Potholder @ Miss Mary Sewing Classes 8. A faster way to make plus quilts @ For the Love of George 9. Quick hair iron cozy by gatheringtwigs @ Craftster

So much inspiration! I actually already started one of these projects a while back - fabric house ornaments made using the excellent tutorial from Retro Mama. I'm planning to turn them into lavender sachets for our closets.  


See, I've already come this far. About time I finish these! I will keep you updated on my progress. :-)

Patchwork memories

I'm feeling a bit overwhelmed with projects right now - I have way too many WIPs in the works but I keep thinking of new ideas which I just HAVE to put into action right away... It's exhausting! I might have to put a moratorium on any more new projects for now, so I have time to catch up. Curse my short crafting attention span!


This patchwork project was an example of that short attention span. I have several big hand sewing projects going right now, but suddenly I felt an urge to start a machine sewing one. I have had the idea for a cushion cover using photo fabric in my head ever since I made a memory quilt using the stuff waaaay back in 2008 (see it here). And now was the time!

The photos are all from my Instagram feed over the last 1,5 years. The photo fabric sheets are Blumenthal Craft PhotoFabric from Swedish craft store Panduro, but I've used other brands before and they are all pretty similar - I know Michael's and JoAnne's carry them for example. Just feed the sheets through your (inkjet) printer, rinse and iron. For memory quilts and patchwork, the important thing is to make sure you buy photo fabric and not iron-on transfer paper. The iron-ons leave a sort of plastic coating on the fabric, which makes for difficult quilting and just doesn't look as nice. I think these prints came out really well, especially considering that they are Instagram shots (which have a pretty low resolution to start with). What do you think?

I had a blast choosing the color scheme to go with the photos, too. I went with blue to fit with the rest of the cushions on our couch. Another chance to use the awesome text fabric I bought a few weeks ago! Now I just need to actually sew this project together - no starting new projects until it's done! We'll see how that goes...

Hexies, hexies on my mind

It's been over two months since my last hexagon quilt post! To hold myself accountable (and make sure the hexies won't languish indefinitely in my cupboards in favor of some instant-gratification-type project) I thought I would post periodic updates - so here's what's going on in hexie land (a.k.a my living room floor - the only surface in our apartment that is big enough to lay all these out) these days!


I have made a total of 405 hexies so far - that translates to about 2/3 of what I need for the backgound and about 40% of the total hexies needed for the entire quilt. Slow but steady progress! I'm still focusing on getting the background hexies done first. The other day,  decided to lay out the first three lines of letters, just to get an idea of what the background will look like and what the ratio of white to patterned hexies should be. I want the background to be interesting, but it can't be TOO interesting or I risk taking the focus away from the letters. This is what it looks like so far:


And yes, I am fully aware that in these pictures the alphabet actually says A, B, C, D, E, K, L, M, N, F, G, H, I J. But don't worry, the final quilt won't! :-) As I was laying out the hexies on the floor I realized too late that I had gotten the lines mixed up, but since the point  of the exercise was mostly to determine the ratio of white to patterned pieces I didn't bother rearranging them.

Even though cutting out hexies is quite meditative, I have to admit that cutting hundreds of off-wite solids isn't that exciting. Can't wait to start on the actual letters. And now I really need to decide on colors for the letters - I have been thinking about this for months and I still can't decide! Oh well, I still have over 200 background pieces left to make before I REALLY have to make the decision...

That's my progress so far! If you feel like making your own hexagon quilt, check out this post.

Dresden plate potholder

Time for more hand sewing! Keith and I have been listening to this awesome audio book (in Swedish) for several weeks now. We love listening to audio books together - it's much easier to concentrate on the story (and not get caught up in the dishes, dinner or whatever you're doing while you're listening) when you have someone right there with you to discuss it with. We have taken to listening in our combined office/craft room, that way he can work on projects at the desk and I can sit at my sewing table. It's been great. The only problem is that it's hard to go to bed when we get caught up in a particularly interesting chapter! I started this hand sewing project last week to have something to do while we were listening, and it only took two (rather long) evenings to complete.

This potholder/trivet is completely hand sewn, made using my new favorite technique English paper piecing and a perfectly sized Dresden template (which Keith created for me using some computer program or other - don't even ask), and the layers of Insul-Bright and Warm&White batting are held together with some simple hand quilting. I really need to work on my hand quilting skills, as you can probably tell!

I do think I did well on matching the fabrics for this one though. The "hipster kitty" fabric in the center is a really neat Spoonflower fabric by independent designer Andrea Lauren. Although it seems that this particular print has been discontinued since I bought my swatch, I can really recommend a look through her huge library of spoonflower designs.

I really like the text fabric as well, so much so that I bought it in three different colorways. I can see myself using it a lot in future. In fact, I'm already planning on using the blue one for an upcoming project - but more on the later. Have a great week!

Liberty Teacup Pincushion

I've had a teacup pincushion for years - I made it back in 2008 when I first took up sewing again, and it's been very useful. Lately though, it's been looking a little sad:

Such a mess - faded, worn and discolored! So last week I thought I would give it a bit of a makeover. I used a small piece of my favorite Liberty of London Tana Lawn fabric, and re-used the same teacup. The inside is poly-fill mixed with steel wool, this is meant to keep the needles nice and sharp.

Making a teacup pincushion is really easy. You start by making a ball shape using fabric and poly-fill (or you can use quilt batting, wool, thread and fabric scraps, or whatever else you happen to have on hand), and then simply glue the ball to the inside of your teacup. I used the saucer as well - that way you have somewhere to put your seam ripper, bobbins and all those other little things that have a way of disappearing right when you need them...

This was a quick and easy project, and it added some color to my sewing area. Win-win! If you feel like making your own teacup pincushion, here is a link to a tutorial that explains the whole process in more detail.


Subversive Machine Embroidery

Hallelujah, we have Internet access! This past week we've been having a ton of problems with our Internet provider, and while I'm not sure everything's fixed yet, at least we finally have access. It's true what they say, you don't know how much you depend on the Internet until it's taken away.

Less time browsing Facebook and Pinterest has meant more time for crafting, though. Among other things I reorganized the two closets that house my craft supplies, and this gave me the energy to finish off a couple of WIPs that have been hanging around in there for way too long. A great feeling!

I am a big fan of the craftivism movement and sites like Subversive Cross Stitch. Ever since my mom got her Husqvarna Viking Designer Diamond sewing machine, I have been brainstorming ways to combine that subversive feel with the medium of machine embroidery. I'm not much of a cross stitcher myself (not enough patience!) so when mom introduced me to the cross stitch software that came with her Designer Diamond, I was understandably thrilled. I've spent many hours in her studio sewing and creating, but only this week did I get around to actually mounting the finished pieces. Here are a few of them!


I mounted most of the pieces in embroidery hoops because that's what I had on hand, plus I like the look. But I also had a couple of thrifted picture frames which worked well after a fresh coat of paint.
 
 That pink frame now houses another "Girls Just Wanna Have Fundamental Human Rights" embroidery which is winging its way off to a friend to become a birthday present  for her sister. That's part of the charm with machine embroidery - once you have a design programmed and ready to go, you can make several versions of the same design quickly and conveniently, experimenting with different color combinations, background fabrics, sizes and so on. The top picture in this post shows the same "Girls" embroidery on a really nice structured linen - I will be using that fabric again for sure!


I also made a couple of hoops featuring "subversified" Swedish sayings. Not sure what I'll do with them yet, I might have to start a hoopla wall to feature them all. Right now my mind is reeling with ideas for more subversive machine embroidery, so I'm sure there will be more to come!


Do you have any ideas for sayings, quotes, factoids or anything else you think would fit on a cross stitch wall hanging? I would love to hear your ideas!


Hexagon alphabet quilt: My new project

One of the biggest projects I’ve taken on so far this year is starting a hexagon alphabet quilt – hand sewn from nearly a thousand individual hexies! For now I wanted to share some progress pics and tips, but I am working on a how-to for next week, so stay tuned!


I’ll be making the entire quilt top by hand in traditional English Paper Piecing – that means a LOT of hand sewing! I’m fully expecting to spend several years working on this project, and to me that’s part of the charm of EPP – that it’s not meant for fast-results, spur-of-the-moment type projects. To me, hand sewing is a way to slow down in a fast-paced world. It’s really quite meditative, prepping and sewing all those tiny pieces of fabric.So far, I'm working on a bunch of neutrals for the background color.


I did make one concession in the name of modernity, however: I invested in a Sewline Glue Pen. It’s such a life saver, allowing me to prep my paper pieces so much faster than normal and leaving all that hand sewing for when it really matters – joining the pieces. I’m sure that some quilters cringe at the thought of gluing on fabric, but I have tested the method on several smaller projects and found that most of the glue stays on the paper piece rather than on the fabric itself. And it’s water soluble, so whatever small residue is still on the fabric disappears when you wash the finished quilt. If you’re curious, this is an excellent YouTube video describing the process in detail.


Great, isn’t it? I’ve prepped about half of my hexagons so far, and it has been a breeze – the perfect craft for an evening in front of the TV! I’m looking forward to showing you the progress as I go along – I can’t wait to start sewing the pieces together!

Patchwork balls again

I have made a ton of patchwork balls over the years (see this old post for one example), they are my go-to gift for new babies. I make them quite small and put a couple of bells inside, and they are usually a very appreciated gift! When I made my first ones I used this great tutorial by blogger iHanna - but of course by now I could probably make one in my sleep... They are a breeze to sew!

This one I actually made as a gift for Keith - he has been bugging me to make one for him for a couple of years now, lol. We had a few family members over today and the ball was quite a hit with the "grown-ups" too - it works great as a stress ball, perfect for tossing around. I snapped a quick photo with a regular tin can to give an idea of the size:


Now I'm considering making a whole bunch of balls in different sizes - they are just so fun and relaxing to make! I might try to find some Stockholm based kids' charities who could use some extra toys - always a good excuse to get crafting!

Patchworking

How is it December already?? We had the first snow in Stockholm yesterday - and though it melted within minutes, it was still a nice feeling. I've been doing quite a bit of Christmas crafting lately, but nothing I can show yet unfortunately! I have too many family mambers following my blog... So I thought I'd show you another little gift I made for Liv.


It's a patchwork ball, completely hand sewn using a great tutorial posted by iHanna. I've been following Hanna's blog for ages, and finally got round to making this. Hand sewing is really relaxing, and this ball is a great project even if you haven't done much hand sewing before.


I made two different balls for two different babies, and put a couple of little bells inside for added fun. It's the perfect size for throwing around - Keith has already asked me to make one for him, too!


Stockholm is great this time of year - all the Christmas lights, hanging out in cozy cafés, going to the Christmas market right in my neighborhood... I'm ready for the holidays!

Love affair


I'm having a love affair with my new Lumix camera (a gift from my family last Christmas) and I though I'd show my love by making it a handmade camera cosy! Please excuse the messy top stitching, I was in a hurry to finish it! *rolls eyes*


This camera is perfect for me, simple but brilliant. I'm off to snap some more pictures!

Dolls and stitches


This little lady is going to be a gift for a certain someone... As soon as I manage to make some clothes for her, that is! I'm trying to find more time for sewing, it's so much fun but a little time (and space) consuming... This doll was made a couple of weeks ago. My inspiration came from the lovely and talented Jess Brown, though my doll-making skills certainly don't measure up to hers! I tried tea-dying the fabric for the body, to give a bit of an aged look... It was my first time tea-dying, and it worked great! The hair is a thick wool felt (vadmal) stitched on with embroidery floss. The arms are button-jointed.


And this is the view from the window sill! Spring is slowly approaching...


My mom visited last month, and she taught me something I've been dying to learn for ages: free motion stitching! I love it! I'm already experimenting with a major free motion stitched project, which will have to remain secret for a little while... The test piece above reads "Karin loves Keith" in my own very wobbly stitching.

Recently received

I've been lucky enough to receive some really lovely things in recent swaps, so I thought I'd make you jealous! :-)


This first item is a beautifully made fabric bowl, made by Kwality570 on Craftster. Isn't it amazing? I gave it to my mom, and when I visited her last week we tried to make a couple of fabric bowls ourselves. They turned out NOTHING like this, I can tell you! :-)


Next up are two neat homemade soaps, and 3 great custom magnets (do you recognize Stella?), both received in the Craftster Sweat Shoppe Swap. The soaps smell great and I gave the magnets to Stella's parents who liked them a lot.


And last but not least, these lovely ATCs made by Jody, received in a private swap at Swap-bot. I love these pretty vintage ladies!