Showing posts with label green craft ideas. Show all posts

Upcycling vintage teacups: Making teacup candles


This project is something I've been planning to make for AGES, but I only got around to it last week. There is SO much you can make with vintage china - have a look at this list for example. This is a quick and fun way to upcycle old teacups you may have lying around!
 
First, some back story: When Keith and I first moved in together almost a decade ago, all our glassware and china was of the cheapest, most boring IKEA variety. Completely usable, but uninteresting. Then in 2010 two of our friends got married, and for their reception they went out and bought a ton of vintage china plates, glasses and teacups from various charity shops. They mixed them up and made adorable mismatched china place settings, and after the wedding (as, unsurprisingly, they didn't have much everyday use for 80-100 dinner plates and teacups) Keith and I were invited to take some of the china home with us. I was completely in love with the idea and replaced most of our boring china with this vintage variety. This worked really well over the next several years. But there are some less than practical things about unmatched vintage china - for example, most of it was neither microwave or dishwasher safe. So once we both left school and started working and our budget wasn't as tight, we started looking around for a third option. Two years ago, we started collecting a set of tableware which I really love: Pergola by Swedish porcelain makers Rörstrand.

(Image from Rorstrand.se)
By now we have switched out almost all of our old china, and most of it has gone back to the charity shops from whence it came. But I still love many of those old cups and plates, and I've kept some of them with the intent of re-purposing them into something different. I also love "green" and earth friendly crafting - making something new out of something that would instead just become trash. This is the first project I have made so far, and it was both simple and fun.

Vintage teacup candles 


To make your own teacup candles, you can either use the stubs of old, nearly burnt-out candles, or buy shredded candle wax at the craft store. You simply melt the wax in a double boiler (put a metal or thick plastic bowl over a regular saucepan filled with barely simmering water), place a wick into the teacup and pour the wax into the cup.

I started out by using candlewick yarn, waxed yarn which you cut and tie to a pencil or skewer (as when you're making regular tall candles) and rest over the mouth of the cup. But I also had some shorter, waxed wicks which I believe are supposed to be used for making gel candles, and I actually found these easier to use. They are sturdier than the candlewick yarn, so you just pop one into the cup and hold it with your fingers as you pour the wax. In this picture, you can see the little metal plate at the bottom holding the wick in place.


I added some pink wax coloring to the wax as it melted, the color turned out a bit brighter than I was expecting but I still like them. You also have to leave the cups in place for an hour or so to let the wax set and harden - otherwise you can get creases in the surface of the wax.


All done! Right now I'm trying to decide whether to glue the cups to their saucers or not - I'm not sure whether I like the candles better with or without saucers. What do you think?


I'm planning to give these candles away (they make great hostess gifts, for example) over the coming year. And I have another vintage china project in the works, too: Making a couple of vintage china cake stands (like this one) is on my crafty to do-list for this year. I'm happy that those lovely plates and cups will get some more use, instead of languishing in my cabinets!

Liberty Teacup Pincushion

I've had a teacup pincushion for years - I made it back in 2008 when I first took up sewing again, and it's been very useful. Lately though, it's been looking a little sad:

Such a mess - faded, worn and discolored! So last week I thought I would give it a bit of a makeover. I used a small piece of my favorite Liberty of London Tana Lawn fabric, and re-used the same teacup. The inside is poly-fill mixed with steel wool, this is meant to keep the needles nice and sharp.

Making a teacup pincushion is really easy. You start by making a ball shape using fabric and poly-fill (or you can use quilt batting, wool, thread and fabric scraps, or whatever else you happen to have on hand), and then simply glue the ball to the inside of your teacup. I used the saucer as well - that way you have somewhere to put your seam ripper, bobbins and all those other little things that have a way of disappearing right when you need them...

This was a quick and easy project, and it added some color to my sewing area. Win-win! If you feel like making your own teacup pincushion, here is a link to a tutorial that explains the whole process in more detail.


I'm still alive

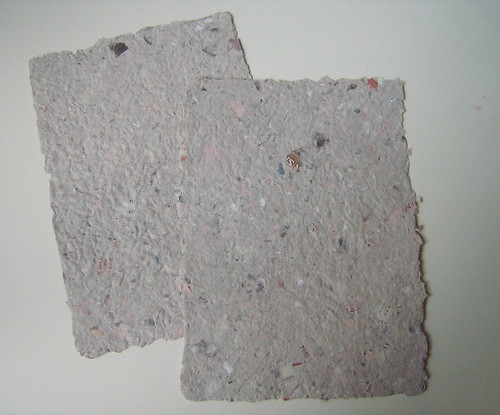
We're having another heat wave over here, and I've been stuck inside studying... Phew! But now I'm finally done with my exam, so I've had a little bit of time to craft. I really wanted to do some sewing, but inspiration still hasn't hit. So instead, I decided to make another batch of homemade paper. Last week when I visited my mom, I mentioned that I remembered making paper with her when I was little. Luckily she still had a screen left, so we whipped up a first batch. We used recycled newspaper, and we didn't use a blender (mom wasn't to keen on wrecking her expensive blender with paper goo...) so the pulp had a lot of chunks in it. Here is what the finished sheets looked like:


This second time I made more of a serious attempt, and I followed this tutorial over at flickr - I can totally recommend it, it's super detailed! I put more white paper in the pulp this time, and I used my old cheapo blender. Worked like a charm! Here's a picture of the second attempt:


I'm not sure whether you can see it in the photos, but this batch came out a lot smoother and lighter than the first - which is great, since I'm hoping to stamp on it with some of the awesome stamps I received in the stamp swap at Craftster.

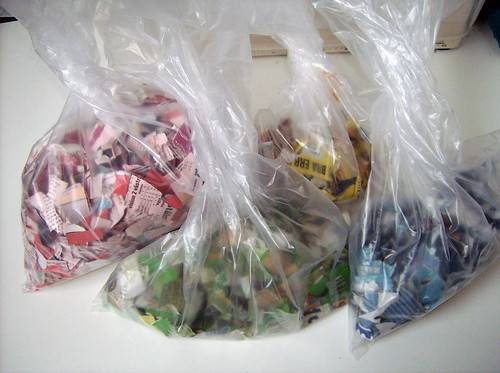
And this evening, since it's too hot to do anything else, I went through some of the paper that was going to the recycling, and shredded it in preparation for another batch of paper sometime later this week! :)


Have fun in the heat!

Craft green this weekend!

We're going to visit Keith's parents this weekend, so I won't be blogging for a couple of days... I thought I'd leave you with a couple of ideas for awesome, environmentally friendly craft projects.


-->
The story: A couple of days ago, my dad and I spent over an hour on the phone discussing creativity, awareness and the politics behind the whole DIY-movement. My dad is a librarian in the small town where I grew up, and he's very involved in the community. He told me that they are having trouble finding fun activities and projects to get young people involved - so naturally I suggested crafting! I love crafts with a political edge like subversive cross stitch or knit graffiti, as well as environmentally aware "reduce, reuse, recycle" projects. Dad asked me to e-mail him some links to "green" craft ideas that I thought would work well at youth centers and workshops. I had lots of fun looking them up for him! I'm sure you've heard of most of them before, but here are a couple of my favorites:

Great tutorial for making handmade paper: I'm trying this as soon as I get back home, I love the look of handmade paper!
Making a cake stand out of thrifted plates and china: An awesome gift idea is using old plates, serving dishes and candle sticks to make cute cake stands. This example uses clear glass plates, but I love how it looks with different colored plates as well.
Make your own envelopes: I'm always looking for ways to use all the old magazines and junk mail I get... This is a template for turning them into pretty envelopes.
Another cute sweater project: I've been brain storming about what to do with the wool sweaters I got last week, and this is one of the projects on my to do-list.
The record bowl: This is a classic, it's so simple and fun!

Have a great crafty weekend!